An Antelope Canyon Hike is Necessary For Your Next Trip
What To Know Before Visiting Antelope Canyon:
How to photograph and what settings professionals use.
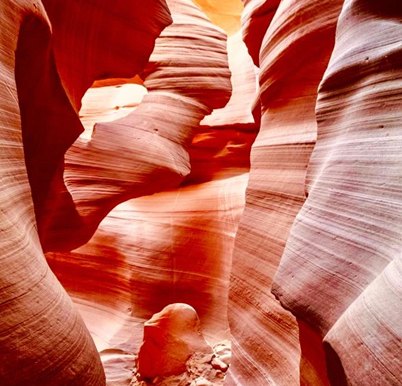
Experience the majestic exploration of the American Southwest by witnessing first hand nature’s cloud scope, also popularly known as the Lower Antelope Canyon.
Imagine yourself in the presence of geological picturesque formations that are daunting and could very well be mistaken as that of a dream.
Well, this could be your opportunity to document and forever remember this adventure as a true event and not that of a dream.
Dixie’s Lower Antelope Canyon Tour, guides visitors from around the world through what many believe to be a photographer’s dream.
History of Antelope Canyon
Antelope Canyon is located east of Page, Arizona. It is within the LeChee Chapter of the Navajo Nation. The largest Native American tribe in the United States.
This famous slot canyon is separated into two scenic sections; the Upper Antelope Canyon and the Lower Antelope Canyon.
The Upper and Lower Antelope Canyon were created from millions of years worth of water erosion of flash floods occurring amidst the Arizona monsoon season.
Since the canyons are located within close proximity to the Navajo people, they acquired Navajo names. The Navajo name for the Upper Antelope Canyon is “Tse’ bighanilini”, which means “the place where water runs through the rocks”. The Navajo name for the Lower Antelope Canyon is “Hazdistazí”, which means “spiral rock arches”.
This describes what can be seen today as the wave-like structure of the rocks. Not only can the majestic structural formations be admired, but they are enhanced with the beams of the sunlight that seep into the narrow canyon openings. The lustrous red-like hue of the sandstone is highlighted to its grandly display.
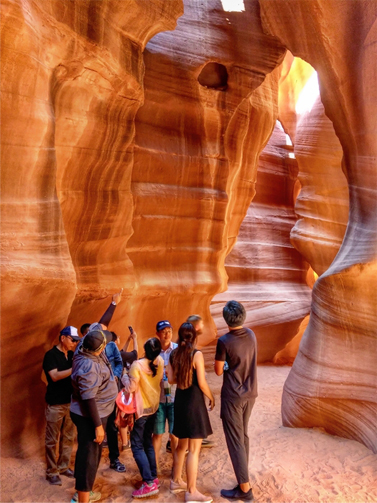
Once home to pronghorn antelope, the canyon walls stand 120 feet above the streambed and is 1,334 feet in length.
What To Know Before Visiting the Lower Antelope Canyon
Dixie’s Lower Antelope Canyon Tour is well equipped with a knowledgeable staff. Aside from assisting you with seeing nature’s beauty, they are well equipped with the knowledge of advising how to properly capture the essence of the canyon via photography.
As staff members, they have assisted numerous visitors from amateur to immediate skill level, on how to properly photograph inside the canyon.
Even if you are not a professional photographer and you are using your smartphone, the local tour guides will help adjust your settings on your phone/camera, so that you too can walk away with amazing photos of your experience.
Tips to Getting the Perfect Photo
Here are a few tips to keep in mind while photographing the Lower Antelope Canyon:
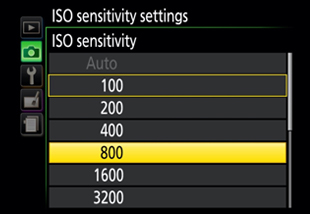
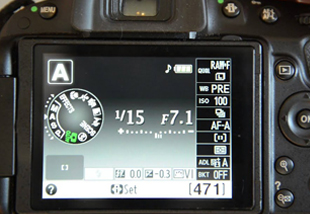
1ISO Settings:
Set your camera between 400-1000. This will vary depending on your brand of camera and whether the crop sensor is on or if you are shooting with a full-frame. The ISO setting on a camera will lighten or darken a photo. The more you increase the ISO number, the brighter the photo. For this reason, the ISO number will capture images in darker environments and allows you to be more flexible with your aperture and shutter speed settings.
2Framing:
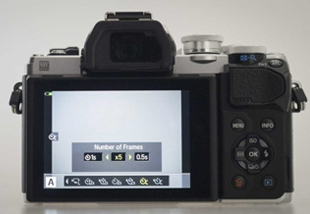
If you decide to shoot a full frame set your camera should be set at 24-50mm. If you are going to shoot with a crop frame, set your camera to 10-24mm. The role of any rule of composition is to draw the eye into a photograph. Framing refers to using elements of a scene to create a frame within your frame.
3Lens:
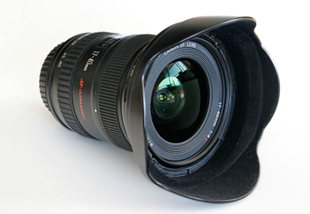
Standard lens or wide-angle lens. This will be your personal preference and choice, but keep in mind the Lower Antelope Canyon does not permit an interchangeable lens while on tour. Due to the dust and sand that is present in the Canyon.
4Shutter Speed:
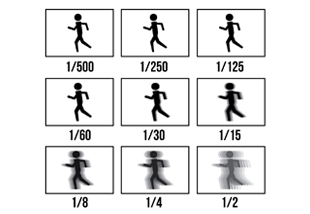
Set between 1/10 to 1/100-200. Shutter speed or exposure time is the length of time when the film or digital sensor is exposed to light. The longer the shutter is open the more light is captured in your photograph.
5Exposure:
Exposure should be set between -1.0 to +1.0. The exposure and shutter speed both work together and are determined by 3 factors; shutter speed, lens aperture, and scene luminance. It is a crucial part of how bright or how dark your photos will appear.

6Aperture:
Set between 5F-12F. The lower the f/stop- the larger the opening in the lens, the less depth of field, the blurrier the background. Keep this in mind when adjusting the settings.
7Capturing Colors:
Set between 4500-5500 for blue and purple tones. These would be present in the early morning tours that are offered in the summer season. Set between 5500-6500 for the orange and pink tones. This would apply to the popular morning and late afternoon tour times.

Best Time to Visit Lower Antelope Canyon

When booking your reservation, keep in mind the time of year your visit will occur. This is pivotal because if you are counting on taking great photos, the time of year will affect the lighting inside the canyon.
From March to September, the early morning (7:45 AM to 10:45 AM) and late afternoon (from 2:15 pm to the last tour of the day) are the best times for photography lighting.
From October to February, due to the changing position of the sun for the winter months. All tour times throughout the day will be ideal, in regard to photography lighting.
There is a lot of color and contrast in the lower slot canyon. It helps to have a camera with a decent low light ability.
Booking Reservations
The most popular tour times are generally booked between 10:15 AM to 1:15 PM.
It’s a fair statement to share that you may have the occasional accidental tourist walk into your photo. In attempts to prevent this from happening, we have made the adjusted changes to the guided hiking tours. There will be a smaller capacity of 10 people per tour guide.
In addition to trying our best to space apart tour groups with five minutes to spare, we do this because we value our customers and want you to have the best experience and equal opportunity to capture your moment in Antelope Canyon.
Guests are asked to remain with their tour guide and assigned group to avoid issues with other tour groups and their photo opportunities.
We hope these mindful acknowledgments will permit all our guests to have an enjoyable and memorable experience while with us.
Remember to tag us on Instagram, use #DixiesLACT. We love interacting with our customers and seeing that you enjoyed nature’s beauty while you were with us.
We look forward to meeting you.

